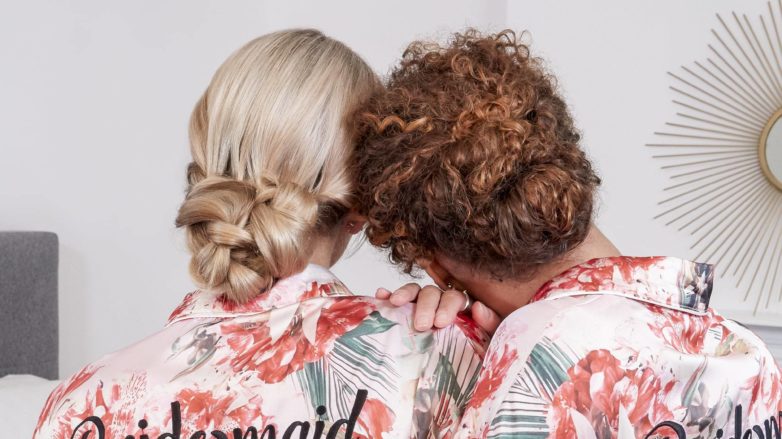
How to create a wedding chignon
Get perfect hair with the aid of our wedding chignon tutorial and a helpful friend.
You Will Need
The wedding chignon/chignon comes from the French phrase ‘chignon du coq’ which literally can be translated as ‘nape of the neck’. Essentially, a sophisticated low bun, the chignon hairstyle is a wedding favourite (and with good reason) because wedding hair doesn’t get much more classic than a pretty updo.
And this wedding chignon is perfect because it’s easy enough to do yourself, which is great as you won’t even need the help of a hairstylist! So if you’re a bride-to-be yourself, bridesmaids or even a wedding guest, watch our video tutorial with product recommendations and styling tips.
Apply a texturising spray.
Prep for styling by spritzing the VO5 Dry Texturising Spray throughout your hair. This will help to add grip and texture to your hair, making it easier to work with and giving your look more hold.

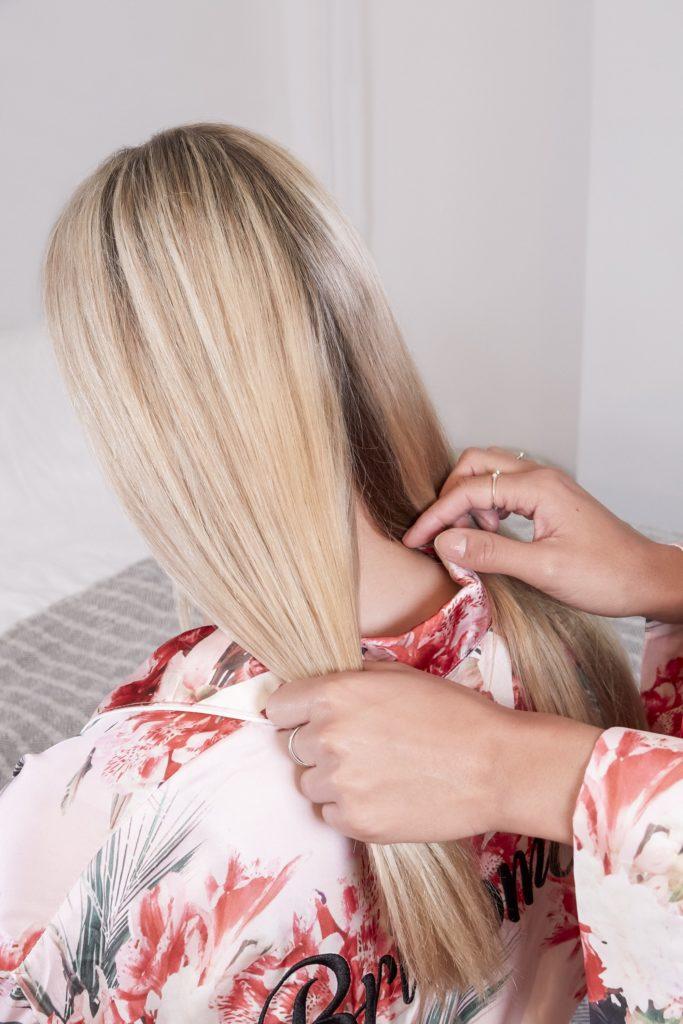
Part your hair.
Divide your hair into 2 sections, making sure they’re both roughly the same size. For a more precise part, you can use a tail comb to do this.
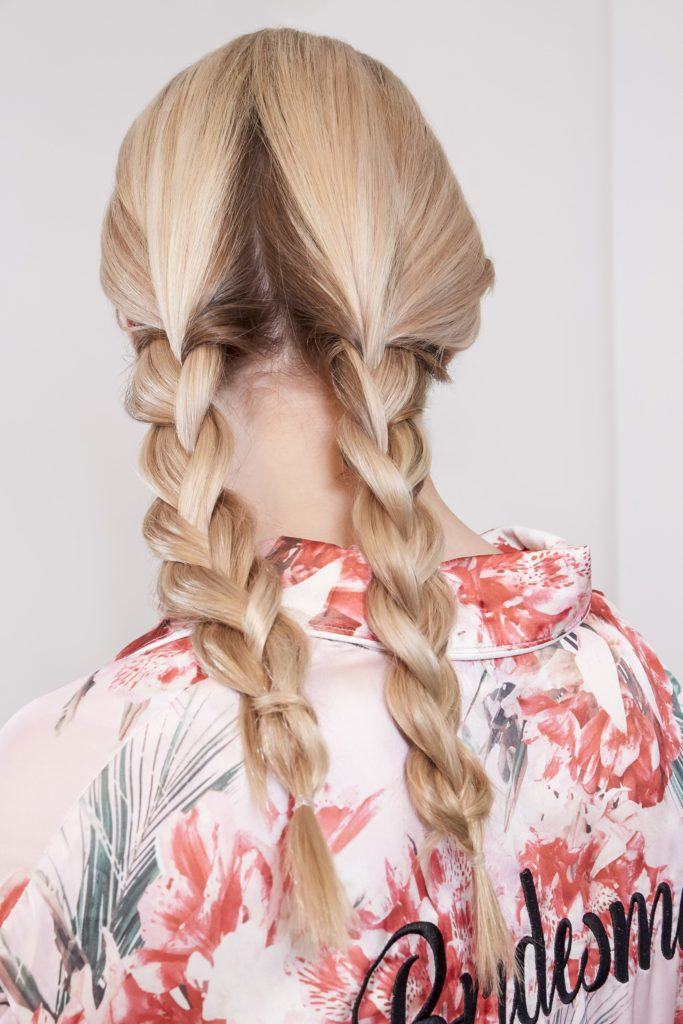
Get braiding.
Use the basic 3 strand method to create 2 loose pigtail braids. Secure each of them with an elastic, then gently pancake (pull them apart) to give them more volume.
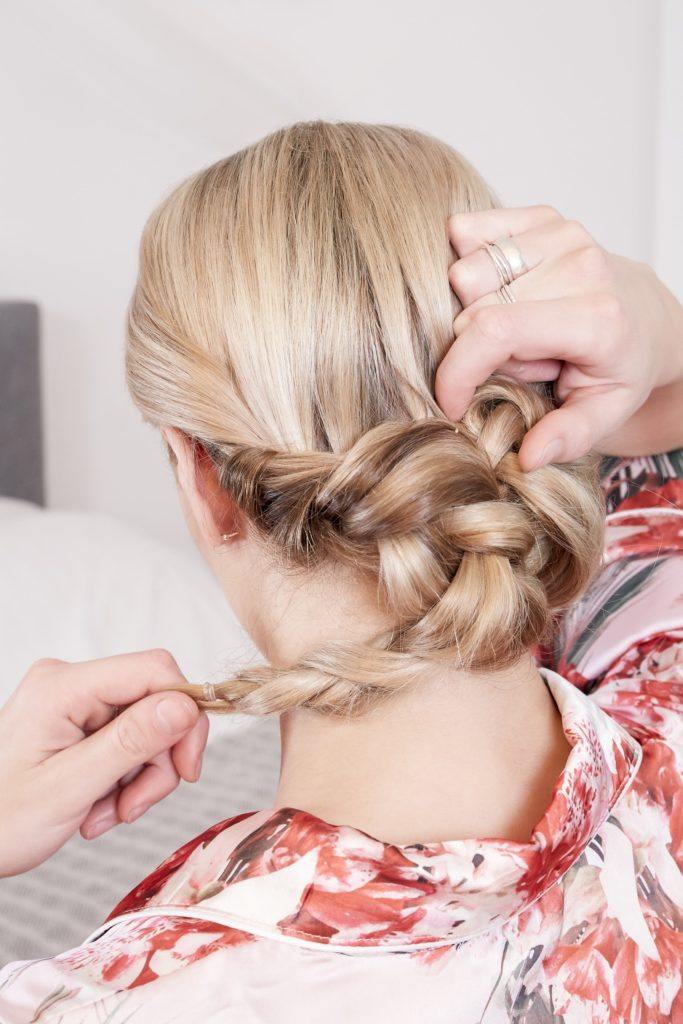
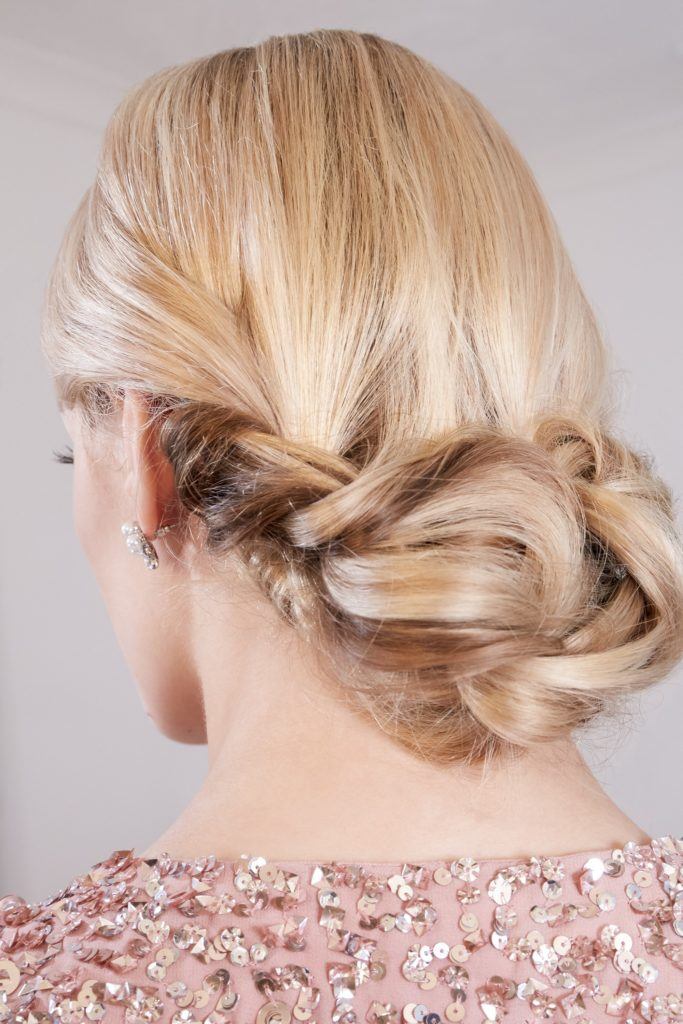
Wrap the braids into a bun.
Wrap the braids into a chignon position, using bobby pins to secure the hair in place. Remember to tuck in any loose ends for a neater finish.
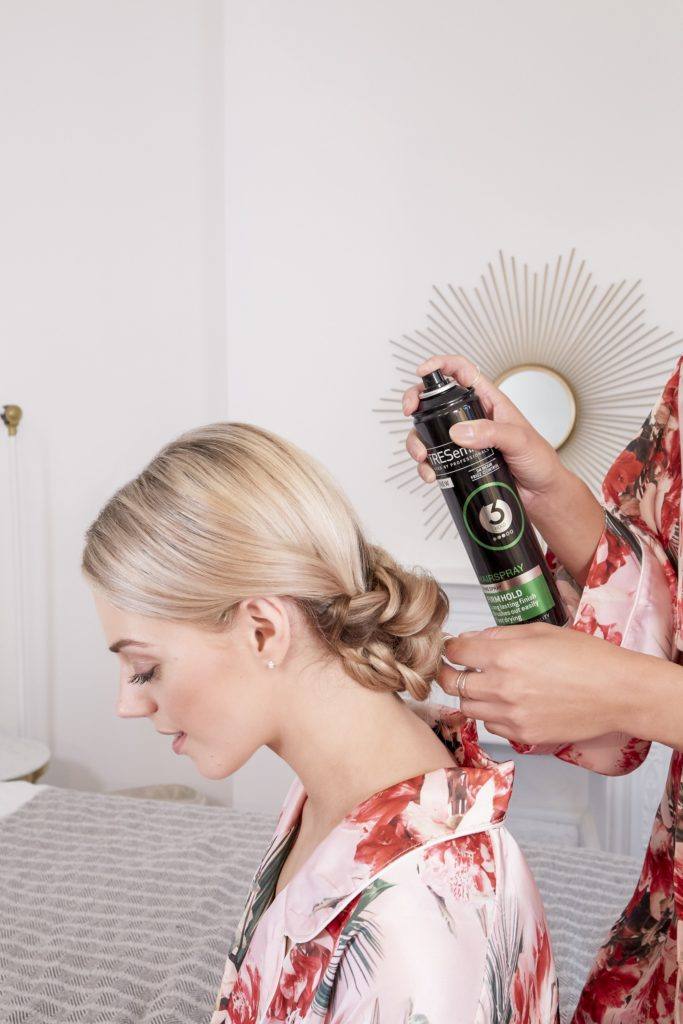
Perfect & set.
Perfect your wedding chignon by using your comb to lift any sections of hair that need a bit of extra volume. To finish, set the whole look in place with the TRESemmé Firm Hold Hairspray, so that it lasts all day.
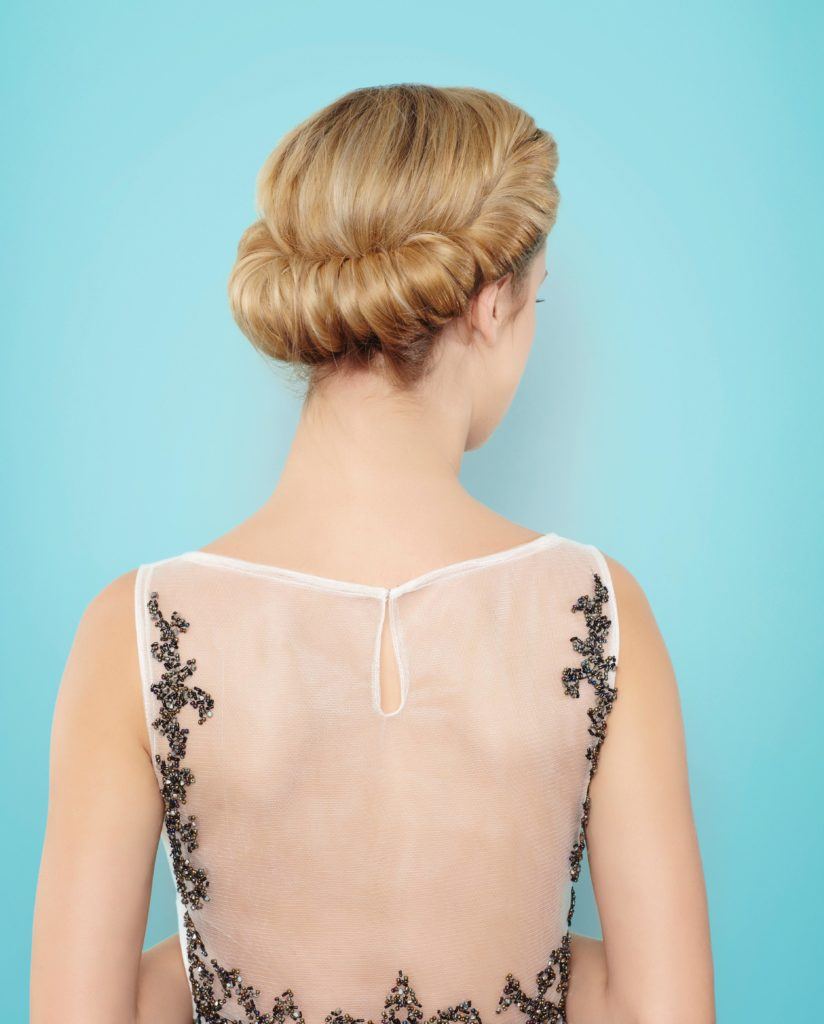
Final look.
And there you have it, you’ve mastered this romantic chignon for a wedding, prom, or whenever you just want your hair to look extra fancy!
Styling tip: To add an extra special touch to the look, play around with adding different flowers or sparkly hair accessories to take your updo to the next level.
If you’re after more wedding hair inspiration, it’s about time we introduced you to the croissant chignon. Another beautiful variation on the classic wedding chignon, it’s just as chic as it is sophisticated, not to mention you don’t need a glam squad to achieve the look either (yay!). Sneak a peek at our step-by-step guide below and you’ll have mastered this bridal updo in minutes.
How to create a croissant wedding chignon
Prep your hair.
To really glow on your wedding day, begin by prepping your hair with the TONI&GUY Smooth Definition Shampoo and Conditioner to help smooth your strands and add a dazzling shine. Once you’ve done this, blowdry your hair straight.

Apply a headband.
To create your chignon, you’ll need to apply a headband to help you form the croissant shape. Stretch a thin elastic headband over the top of your head and place it so that the front rests a few centimetres from your forehead, while the back sits just above the nape of your neck.

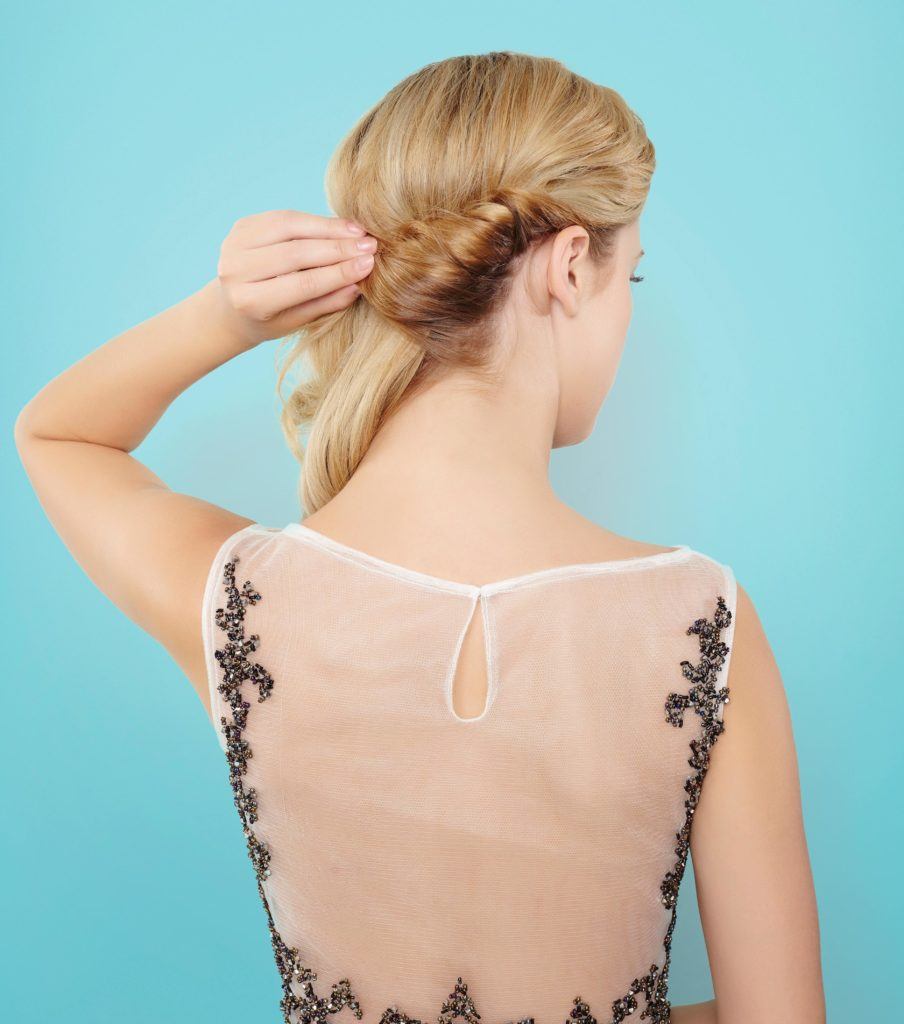
Wrap your hair around the headband.
Now it’s time to form your chignon. Starting from one side of your head, and working with small sections of hair at a time, wrap your hair into the headband.
Keep on wrapping.
Keep on wrapping your loose hair into the headband to create that gorgeous, croissant roll effect. Once all of your hair is wrapped over the headband (and it’s completely covered), gently tug at your chignon to loosen it – this will help make it appear thicker and fuller!

Final look: Set with hairspray.
To help keep your wedding hair up and firmly in place all night long, give it a spritz of the VO5 Ultimate Hold Hairspray. Now, go forth and get hitched!

