Messy milkmaid fishtail plait: Step-by-step guide
A fresh twist on a classic...

Time
Skill
You Will Need
After a romantic updo for date night or a party? We’ve got just the thing, and it comes in the form of our milkmaid fishtail plait step-by-step tutorial. This elegant, yet effortlessly cool hairstyle is super easy to create at home, even if you’re a braiding rookie! Seriously, you’re only 7 steps away from an envy-inducing updo – so what are you waiting for?
Messy milkmaid fishtail plait: Step-by-step tutorial
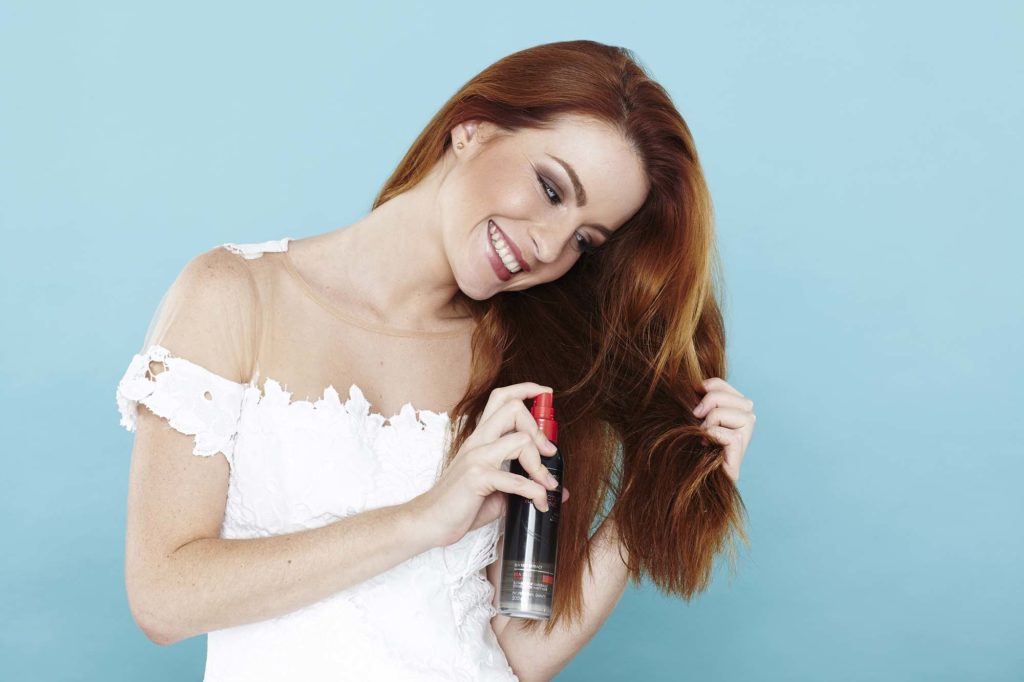
Prep your hair.
Start by prepping your hair with a sea salt spray, like the TRESemmé Perfectly (un)Done Sea Salt Spray, to help add texture and make your strands easier to braid.

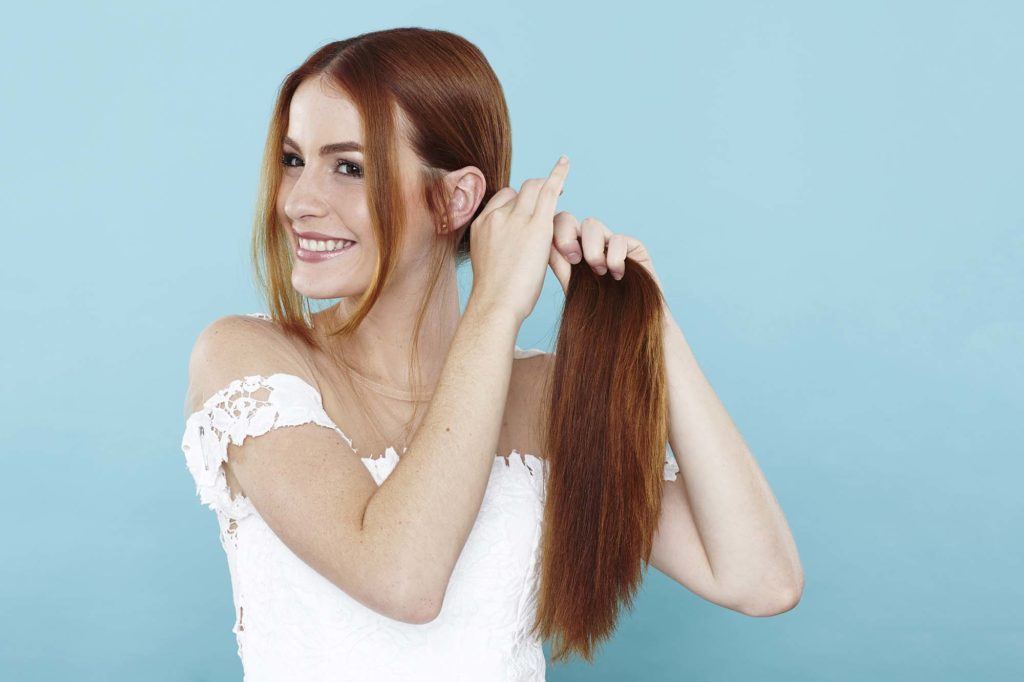
Create 2 pigtails.
Then tie your hair into 2 pigtails. Secure each pigtail in place with a hairband just below your ear. If you have a fringe or long layers near your face, leave these free.
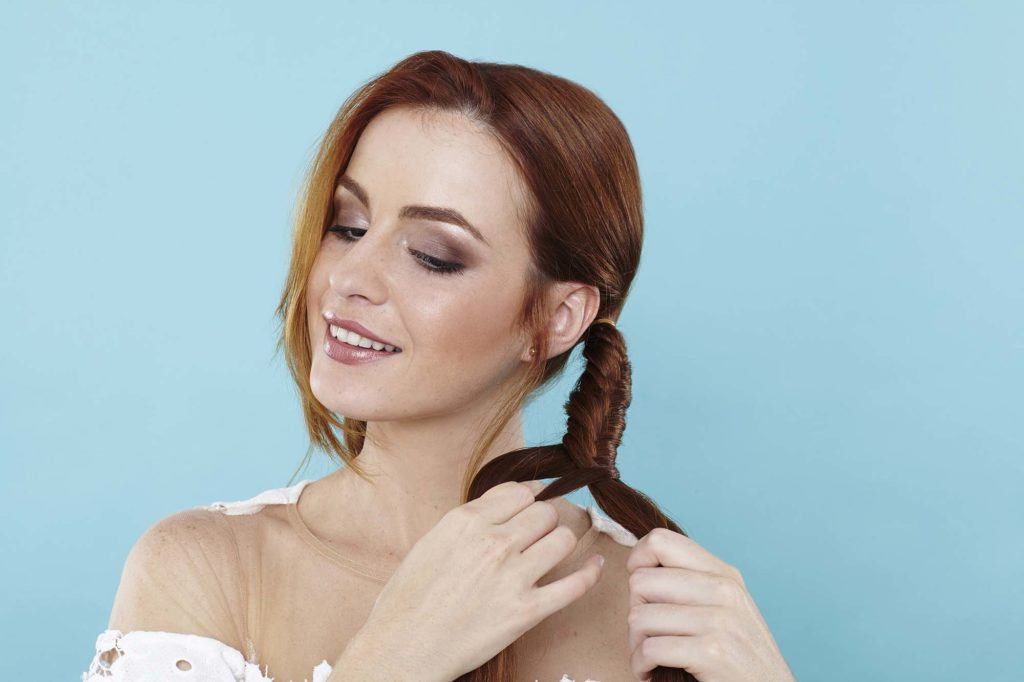
Fishtail plait your pigtails.
Now it’s time to fishtail plait your pigtails. Working on one pigtail at a time, divide your hair into 2 equal sections. Then, take a thin piece of hair from the outer edge of the right section, and pull it over to the left section – make sure to cross the hair in front, not behind.
Repeat the same technique on the left section of your hair, ensuring that you are holding your tresses tightly while you braid, so your plait doesn’t come loose.
Once you reach the bottom, secure your fishtail plait with a clear elastic. Then, pancake your plait to loosen it and make it appear slightly disheveled, before repeating the whole braiding process on your other pigtail.
Create your milkmaid fishtail braid.
You’ll now need to secure the fishtail plaits across your head to create the a milkmaid braid effect. Take your left plait and place it across the top of your head near the front, just behind your loose sections of hair that you pulled out. Secure it with bobby pins every few inches down the plait.
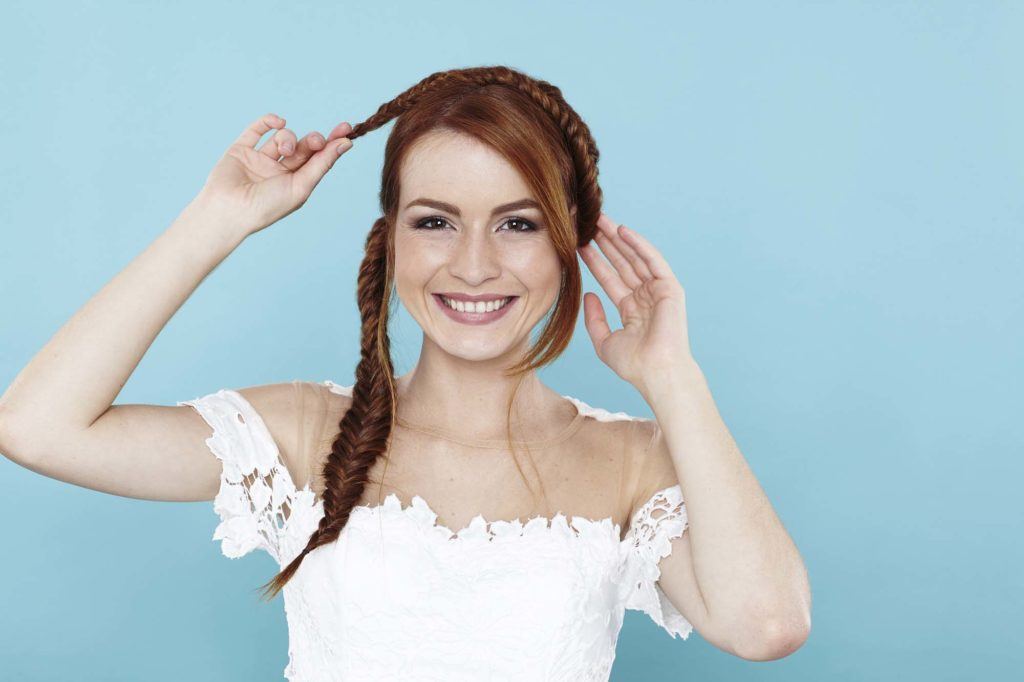
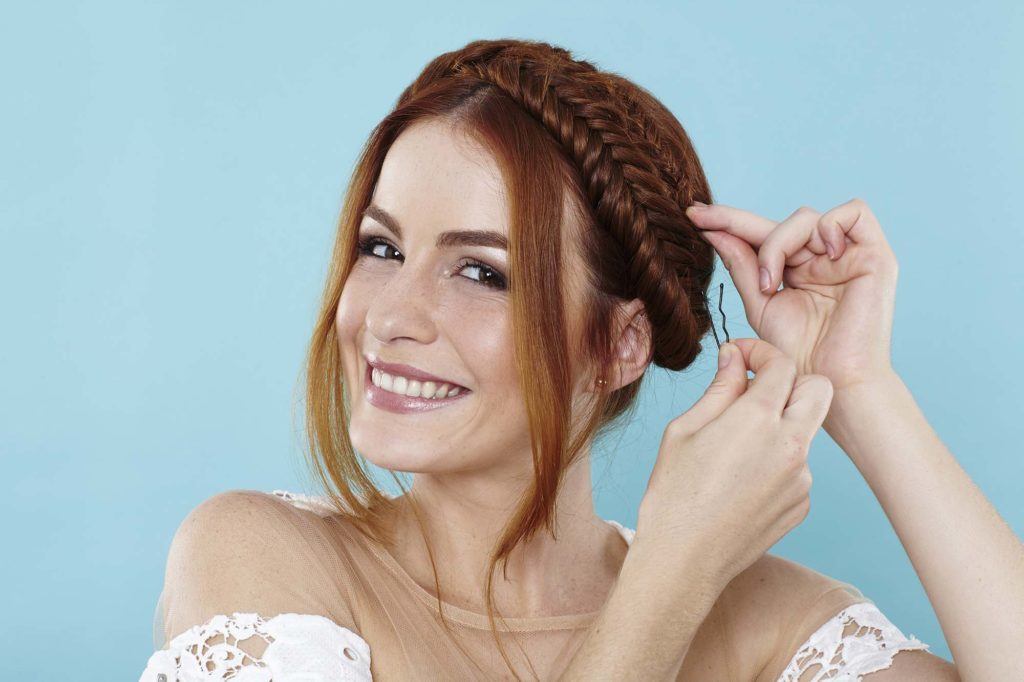
Secure your milkmaid braid in place.
Now do the same with the right plait, placing it just behind the left one, and securing it in place with some more bobby pins.
Editor’s tip: If you have long hair and find that your plaits don’t finish in the centre of your head, you can bring them down behind your ears and secure them there so that the ends are hidden from view.
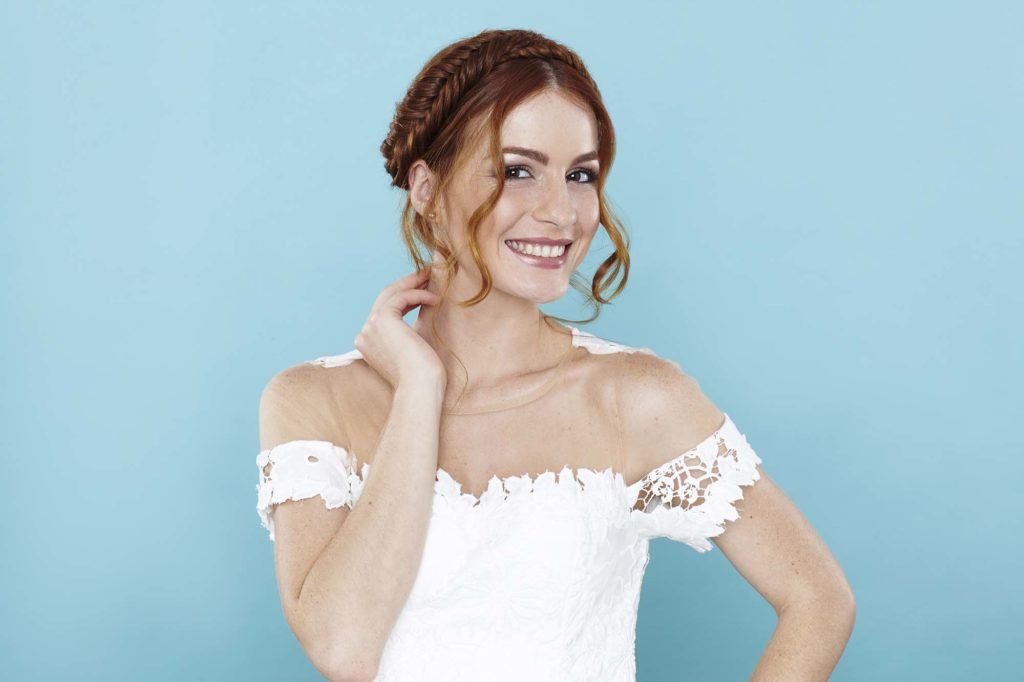
Final look: Curl your wispy strands.
For a romantic finishing touch, use a curling wand to curl the front loose sections of your hair. Don’t forget to set your look with the VO5 Ultimate Hold Hairspray so that it’s wobble-free!
Loved our milkmaid fishtail plait step-by-step guide? Then head on over to our Braids page for tonnes more hair tutorials and on-trends styles, like the Dutch braid look as demonstrated by our resident beauty vlogger N1kk1sSecr3t.

